Guides
What Sample Rate Should I Record Vocals At? (Simple Answer)
Sample rate is one of the first settings you see when you start recording, and the choices can be confusing. This guide explains sample rate and bit depth in plain words, the best settings for music, podcasts and video, when higher rates make sense, and the mistakes that cause problems.
Quick Answer
For most vocal recording, use 44.1 kHz or 48 kHz at 24-bit. Choose 44.1 kHz for music meant for streaming and CD, and 48 kHz for anything that goes with video. Higher rates like 96 kHz create much larger files and rarely improve vocals at home. Bit depth, gain staging and your room matter more.
How this guide was put together
This guide is based on manufacturer manuals, published specifications and widely used audio reference standards. Mandrillis does not run hands-on tests for these guides, so treat figures as typical values and check the manual for your own gear before changing settings.
What Sample Rate Means
Digital audio is made by measuring a sound wave many times per second. Each measurement is a sample. The sample rate is how many samples are taken each second.
A rate of 44.1 kHz means 44,100 samples every second. Higher rates take more samples, which captures higher frequencies and creates bigger files.
- 44.1 kHz: 44,100 samples per second.
- 48 kHz: 48,000 samples per second.
- 96 kHz: 96,000 samples per second.
- Human hearing reaches up to about 20 kHz at best, and less as we age.
Why 44.1 kHz Is Enough for Most Vocals
A rule in digital audio says a sample rate can capture frequencies up to half its value. At 44.1 kHz, that is about 22 kHz, which is above the top of human hearing.
That is why 44.1 kHz has been the standard for CDs for decades. It captures everything people can hear in a voice.
Which Sample Rate to Use
Common choices for home recording, all at 24-bit.
| Project | Sample rate | Why |
|---|---|---|
| Music for streaming or CD | 44.1 kHz | Matches the final format |
| Video, film or YouTube | 48 kHz | Standard for video |
| Podcasts | 44.1 or 48 kHz | Either works, 48 suits video podcasts |
| Sound design or heavy pitch editing | 96 kHz | Extra detail for extreme processing |
| Low power computer | 44.1 kHz | Smallest files and lowest load |
Bit Depth Matters More Than Sample Rate
Bit depth sets how precisely each sample is measured. It decides the dynamic range, the gap between the quietest and loudest sounds you can record cleanly.
Record at 24-bit. It gives a large range, so you can leave plenty of headroom without adding noise. 16-bit is fine for final files but leaves less room for error while recording.
- 16-bit: about 96 dB of range, the CD format.
- 24-bit: much more range, the recording standard.
- 32-bit float: extra headroom on some interfaces and recorders.
When a Higher Sample Rate Makes Sense
Higher rates are not wrong, they are just rarely needed for vocals. They can help in a few specific cases.
Good Reasons to Use 96 kHz
These situations can benefit from the extra samples. Most home vocal sessions do not need them.
- Slowing audio down a lot for sound design.
- Extreme pitch correction or time stretching.
- Some plugins that sound cleaner at higher rates.
- A client or studio that asks for it.
The Costs of Higher Rates
A 96 kHz file is about twice the size of a 48 kHz file. Your computer also works harder, which can cause crackling with many plugins.
On a home setup, those costs often outweigh the small benefit.
Match the Rate Across Your Setup
Your DAW project, your audio interface and your computer's sound settings should all use the same sample rate. A mismatch can cause clicks, pops, or audio playing at the wrong speed.
Set the rate when you create a new project and keep it for that whole project.
- Set the project sample rate first.
- Check that the interface follows the project rate.
- Match the computer's system sound settings.
- Do not change the rate halfway through a project.
How to Change the Sample Rate in Your Setup
Most DAWs set the sample rate when you create a new project. Look for a project settings or audio settings window before you record anything.
Your interface usually follows the DAW automatically. Some interfaces have their own control panel app where you can also check or set the rate.
Quick Steps
Do this once at the start of every new project. It takes less than a minute.
- Create a new project and open its audio settings.
- Choose 44.1 kHz for music or 48 kHz for video.
- Set the bit depth to 24-bit.
- Open the interface's control app, if it has one, and confirm the same rate.
- Check the computer's sound settings match as well.
Converting Files That Do Not Match
If you import a file at a different rate, most DAWs offer to convert it. Accept the conversion so it plays at the right speed and pitch.
When sending files to someone else, tell them the sample rate and bit depth so they can match their project.
Settings That Improve Vocals More Than Sample Rate
If you want better vocals, these steps make a much bigger difference than raising the sample rate.
- Set gain so peaks reach about minus 10 to minus 6 dB.
- Record in a quiet room with soft materials around you.
- Use a pop filter and a steady mic distance.
- Choose a mic that suits your voice and room.
- Record at 24-bit for headroom.
Exporting Your Finished Vocals
You can record at one rate and export at another. Streaming services and most music platforms accept 44.1 kHz or 48 kHz files at 16 or 24-bit.
Keep a 24-bit master copy of every finished song. You can always make smaller versions from it later, but you cannot add back lost detail.
- Streaming upload: check the platform's recommended format.
- Video: export at 48 kHz to match the picture.
- Archive: keep the original 24-bit project files.
Common Mistakes
These sample rate mistakes cause the most trouble at home.
- Mixing 44.1 kHz and 48 kHz files without converting them.
- Recording at 192 kHz on a slow laptop and getting dropouts.
- Recording at 16-bit and clipping loud notes.
- Changing the project rate after recording.
- Assuming a higher number always sounds better.
The Bottom Line
Record vocals at 44.1 kHz for music or 48 kHz for video, always at 24-bit. These settings capture everything you can hear while keeping files small and your computer stable.
Spend your effort on gain staging, your room and mic technique. They change the sound far more than sample rate does.
Vocal Mic and Interfaces From Our Reviews
A studio condenser for vocals and two interfaces that record at common sample rates.
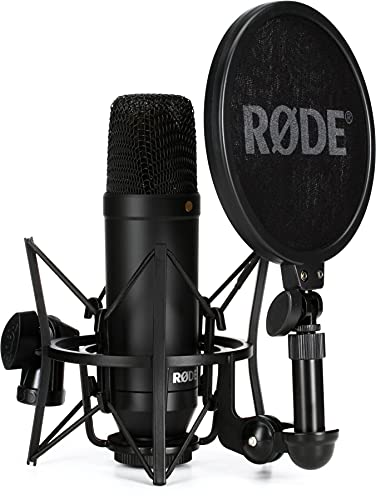
Rode NT1
Mentioned
Who Should Buy It
- Singers and rappers recording one voice at a time in a quiet room
- Voice-over artists and audiobook narrators who need a very low noise floor
- Home producers upgrading from an entry-level condenser
- Buyers who want the shock mount and pop screen bundled rather than bought separately
Skip It If
- You do not own an audio interface or mixer with a microphone preamp
- You stream from an untreated room with keyboard and fan noise
- You need omnidirectional or figure-eight patterns
We may earn a commission at no extra cost to you.
Last verified: October 2026

Solid State Logic SSL 2+ MKII
Mentioned
Who Should Buy It
- Podcasters and solo producers who want a bundled condenser microphone alongside their interface
- Musicians who want Legacy 4K analog enhancement for console style coloring on their recordings
- Buyers who want MIDI I/O built directly into their interface rather than needing a separate MIDI box
- Producers who want zero-latency monitoring with stereo loopback for streaming or voiceover work
Skip It If
- You need more than 2 simultaneous mic inputs for a larger session
- You already own a condenser microphone and do not want to pay for a bundled one
- You need a confirmed preamp gain figure in decibels before purchase
We may earn a commission at no extra cost to you.
Last verified: November 2026

Behringer U-PHORIA UMC204HD USB Audio Interface
Mentioned
Who Should Buy It
- Solo singer-songwriters tracking vocals and one instrument at a time
- Podcasters or streamers who want two phantom-powered combo inputs
- Musicians who want MIDI In and Out without a separate interface
- Buyers who want a straightforward budget interface from an established name
Skip It If
- You need four or more simultaneous inputs
- You require a confirmed software bundle before buying
- You need a dedicated high-impedance instrument input and none is stated
We may earn a commission at no extra cost to you.
Last verified: November 2026
Keep Reading
Related guides and picks on Mandrillis:
- Best Microphones for Vocals : mics for home vocal recording
- How to Set Gain Staging on an Audio Interface : set healthy recording levels
- How to Fix Audio Crackling in a DAW : fix clicks from rate mismatches
FAQs
About This Guide
Mandrillis Team
The Mandrillis editorial team researches and compares audio and music gear using manufacturer documentation, verified specs and real buyer feedback, so you can make a confident purchase without wading through marketing claims.
Read our full research methodology.