Guides
How to Reduce Room Echo Without Acoustic Foam (10 Fixes)
Echo makes voices sound distant and boxy, and thin acoustic foam often does less than people expect. This guide explains why rooms echo, how to test yours, ten low-cost fixes using things you already own, and how microphone choice and placement cut echo further.
Quick Answer
To reduce room echo without acoustic foam, add soft, heavy materials near where you record: a thick rug, heavy curtains, a blanket behind you and filled bookshelves. Record in a closet full of clothes for the deadest sound. Then move closer to the microphone and use a dynamic mic, which picks up less of the room.
How this guide was put together
This guide is based on manufacturer manuals, published specifications and widely used audio reference standards. Mandrillis does not run hands-on tests for these guides, so treat figures as typical values and check the manual for your own gear before changing settings.
Why Rooms Echo
Sound travels out from your mouth or speakers and bounces off every hard surface. Bare walls, windows, wood floors and ceilings all reflect sound back toward the microphone.
When those reflections arrive a split second after your voice, the recording sounds hollow, distant or boxy. Small, empty rooms with parallel walls often sound the worst.
- Hard surfaces reflect sound.
- Soft, thick materials absorb it.
- Uneven shapes like bookshelves scatter it.
- Empty rooms echo more than furnished ones.
Why Thin Foam Often Disappoints
Thin foam tiles absorb high frequencies but do little for lower mids and bass. A room covered in thin foam can sound dull and still boomy at the same time.
Thick, dense materials absorb a wider range. That is why heavy blankets, full closets and stuffed furniture often work as well as or better than cheap foam.
Test Your Room First
A quick test shows how much work your room needs. It also lets you hear each improvement.
- Stand where you record and clap once, sharply.
- A short, dry clap means low echo.
- A ringing or fluttery tail means strong echo.
- Record 20 seconds of your voice before and after each fix to compare.
Echo Fixes Compared
How common household fixes stack up for home recording.
| Fix | How well it works | Notes |
|---|---|---|
| Clothes closet | Very well | Hanging clothes absorb a lot |
| Heavy blanket behind you | Well | Covers the most important reflection |
| Thick rug | Well | Stops floor reflections |
| Heavy curtains | Well | Covers glass, which reflects strongly |
| Filled bookshelves | Moderate | Scatter sound |
| Egg crates | Poor | Too thin to help much |
10 Ways to Reduce Echo Without Foam
Start with the fixes closest to the microphone. Reflections near you matter far more than ones across the room.
1. Record in a Closet
A closet packed with clothes is one of the best free recording spaces. The clothes absorb sound from every direction.
Face into the clothes, with the mic between you and them, for the deadest sound.
2. Hang a Blanket Behind You
A cardioid mic hears most from the front, which is the wall behind your head. Hang a thick blanket or duvet there on a stand or hooks.
Moving blankets work well because they are heavy and dense.
3. Put Down a Thick Rug
Hard floors bounce sound straight back up. A thick rug with an underlay under your desk and chair cuts those reflections.
4. Cover Windows With Heavy Curtains
Glass is one of the most reflective surfaces in a room. Heavy, lined curtains absorb far more than thin ones.
Close them while you record.
5. Add Soft Furniture
Sofas, armchairs, beanbags and beds absorb sound. A sofa behind you or beside you helps a lot.
6. Fill Bookshelves
Books of different sizes scatter sound in many directions, which breaks up echo. Fill shelves unevenly rather than in neat rows.
7. Use Pillows Around the Mic
Pillows or cushions placed around and behind the mic on your desk form a small absorbing space. It is a quick fix for podcasting and voiceover.
8. Avoid the Room's Center and Corners
The exact middle of a room and tight corners often sound the worst. Try recording a few feet from a wall, facing into the room or toward soft furniture.
9. Move Closer to the Mic
Getting closer is the fastest fix of all. At 2 to 4 inches, your voice is much louder than the room, so echo drops into the background.
Use a pop filter at close distances.
10. Use a Dynamic Mic
Dynamic mics are less sensitive than condensers. Used close, they pick up your voice and far less of the room.
Many podcasters in untreated rooms rely on them for this reason.
Safety and Practical Notes
Heavy blankets and curtains need secure hanging. Use proper hooks or stands rated for the weight, and keep fabrics away from heaters and hot lights.
Leave space for air flow near computers and amplifiers, so they do not overheat under blankets or cushions.
Build a Simple Vocal Booth for Almost Nothing
If you record often, a small portable vocal booth beats treating a whole room. You only need to surround the mic with soft material on the sides and back.
Many people build one in an afternoon from things already in the house. It folds away when you are done.
Three Easy Versions
Pick the version that fits your space. Each one blocks reflections close to the mic, which matters most.
- Box booth: line an open cardboard box with a folded towel or blanket, then place the mic inside facing out.
- Clothes rack booth: hang two heavy blankets over a rolling clothes rack to form a U shape around your seat.
- Door booth: drape a duvet over an open door and record facing into it.
- Keep at least a few inches between the mic and the material so it does not sound muffled.
Echo Fixes for Listening, Not Just Recording
The same fixes improve how your studio monitors sound. Less echo means clearer mixes and more accurate bass decisions.
Focus on the walls beside your listening spot and behind you, where the first reflections from your monitors land.
Common Mistakes
These mistakes waste effort or make the sound worse.
- Covering the walls with egg crates or thin foam only.
- Treating the far side of the room instead of near the mic.
- Sitting far from the mic in an echoey room.
- Using a sensitive condenser mic in a bare room.
- Skipping a before and after test recording.
The Bottom Line
You can cut echo a lot without buying foam. Heavy, soft materials near the microphone, a thick rug and curtains do most of the work.
Combine those with close mic technique and a dynamic mic, and most rooms sound clean enough for podcasts, voiceover and vocals.
Gear That Helps in Echoey Rooms
Two dynamic mics that pick up less room sound, and a studio monitor for checking your recordings.
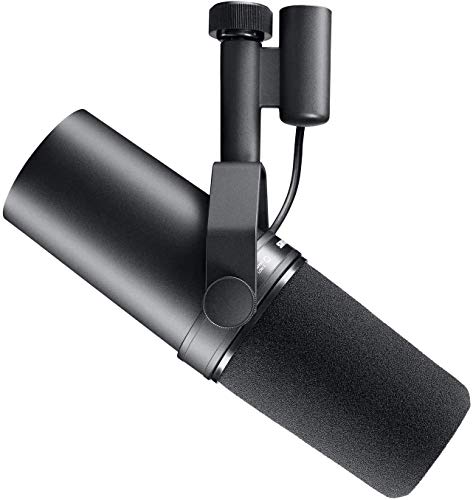
Shure SM7B
Mentioned
Who Should Buy It
- You want a broadcast-quality voice for podcasting or streaming
- You record in an untreated room and need strong noise rejection
- You have or plan to add a clean-gain boost like a Cloudlifter
Skip It If
- Your interface or preamp can't provide enough clean gain
- You want the most affordable entry point into XLR microphones
We may earn a commission at no extra cost to you.
Last verified: September 2026

Rode PodMic Dynamic Podcasting
Mentioned
Who Should Buy It
- Co-hosted podcasts setting up a permanent two-seat studio
- Interview shows that need a guest position ready at all times
- Streamers moving from a USB microphone to an XLR dynamic on a boom
- Small offices and schools building a simple voice recording room
Skip It If
- You are a solo podcaster who only needs one microphone
- You do not own an interface or mixer with XLR inputs
- You prefer a USB microphone with no additional gear
We may earn a commission at no extra cost to you.
Last verified: October 2026

Yamaha HS7 100-Watt 6.5"
Mentioned
Who Should Buy It
- Mix engineers who want the honest HS series balance plus low end extension
- Electronic and hip hop producers who need to hear sub bass below 43 Hz
- Buyers who prefer a matched sub from the same maker as their monitors
- Home studios with room to place a sub properly
Skip It If
- You want a forgiving, musical playback speaker rather than a critical monitor
- Your room is too small to integrate an 8 inch subwoofer
- You need balanced inputs on the subwoofer
We may earn a commission at no extra cost to you.
Last verified: October 2026
Keep Reading
Related guides and picks on Mandrillis:
- Best Podcast Microphones : mics that handle echoey rooms well
- Dynamic vs Condenser Mic for an Untreated Room : pick the right mic type
- How Far Should You Stand From a Condenser Mic? : distance that cuts room sound
FAQs
About This Guide
Mandrillis Team
The Mandrillis editorial team researches and compares audio and music gear using manufacturer documentation, verified specs and real buyer feedback, so you can make a confident purchase without wading through marketing claims.
Read our full research methodology.